--- Let's get started with Tensorflow2 ---
Step 1: Data Annotations
Download the tool from the given github link:-
https://github.com/tzutalin/labelImg
 |
| You will see same interface as above |
Click on Open Dir and select the folder where
your training/test images are. Then start labelling all images in the dataset.
 |
| The selected image is loaded in the LabelImg Interface |
 |
 |
| Create the Bounding
Box and write the Label name corresponding to the image |

Select PascalVOC from the option. Click on the Save button and a corresponding XML file will be saved in the directory with the image.
Step 2 : Mounting Google Drive
To Mount your drive execute below code.
After creating the folder change the directory to your desired directory as shown.
Below Code will Clone the Official Models Repository inside your desired folder
This will clone the models repository in the TFOD3 for training and future reference of the model checkpoints. I will be keeping my complete repository and the folder structure in the TFOD3 folder.
Some sample pictures are provided below :

Inside models we have other folder out of
which research and official are the important ones.

Inside the research folder we have the
most important folder object_detection

Step 3 : Installing necessary libraries :
- Installing pycocotools
- Installing tfslim
- Conversion of the protos files to the python files
- Installing setup.py
Step 4 : Importing Packages:
- Importing all the useful libraries
- Importing all the object detection modules
- Configuring some patched for TF2 form TF1:
Step 5 : Training Setup:
- Prepairing Dataset for Custom Training
Let's say we have 4000 images and their 4000 corresponding annotation files. Then we will split it into 80:20 ratio like 3000 images and their 3000 corresponding annotation files in the train folder and 100 images and their 100 corresponding annotation files in the test folder.
 |
| So the directory structure of the dataset will be like this |
- Creating The Dataset for Training
1. Download these files from the given link and place them inside your object_detection folder.
xml_to_csv.py link heregenerate_tfrecord.py link here
2. Inside the object_detection create a folder name images

3. Inside the images folder create train and test folder where you will put the train and test images with their xml files.

4. Creating XML to CSV:
Execute the below code to convert XML to CSV.
!python xml_to_csv.pyprint("Done")test_labels.csv and train_labels.csv files will be created inside the images folder.

- Creating TF Records :
Open generate_tfrecords.py file that you have downloaded early and do these changes on it according to your classes.
5. Creating test and train record files from csv files:
Execute the blow commands to create tfrecord files.Creating train tf record file from csv
!python generate_tfrecord.py --csv_input=images/train_labels.csv --image_dir=images/train--output_path=train.recordCreating test tf record file from csv
!python generate_tfrecord.py --csv_input=images/test_labels.csv --image_dir=images/test--output_path=test.record

6. Creating Labelmap.pbtxt file :
- Create a file Labelmap.pbtxt where we will be keeping the name of the classes.
- Class structure of Labelmap.pbtxt file

7. Training folder
Create a training folder inside object_detection then Place the Labelmap.pbtxt file inside the newly created training folder.

Step 6 : Downloading the Model for Training:
- From the Model Zoo I am using
here EfficientDet D1 you can use
any one according to your choice.

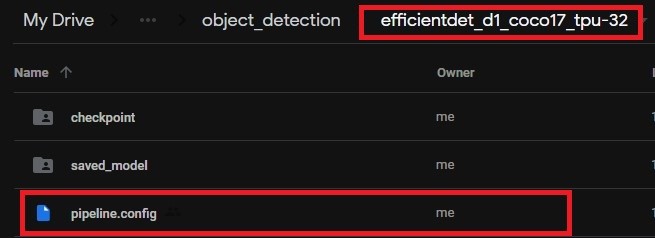
- Downloading the pretrained model efficientdet_d1 from the model zoo and untar it.

- Changes to do in pipeline.config
You will find your config file inside the
downloaded model folder.
Do the following changes according to your requirements:
Step 7 : Start the Training:
- Use below code to start the training process:

Step 8 : Exporting the Inference Graph:
- Use below code:

At the end you can see
something similar it means your trained model is successfully saved into
the exported-models folder.

You will see something
similar like this inside the exported-models folder.

------------------------------------- Congratz you have trained your model -----------------------------------


0 comments:
Post a Comment